I wanted to add a 3phase alternator, halogen headlight with relays, a fuse block, solid state regulator, etc. The more I thought about it the more I realized I should go all the way and convert to neg ground. Although I'm very comforatable with pos ground systems, I wanted to take advantage of some newer stuff ( like led lighting, trip computers, etc) not that you can't get around any issues - it's just easier to conform the 21st century way of thinking.
Wiring Diagram
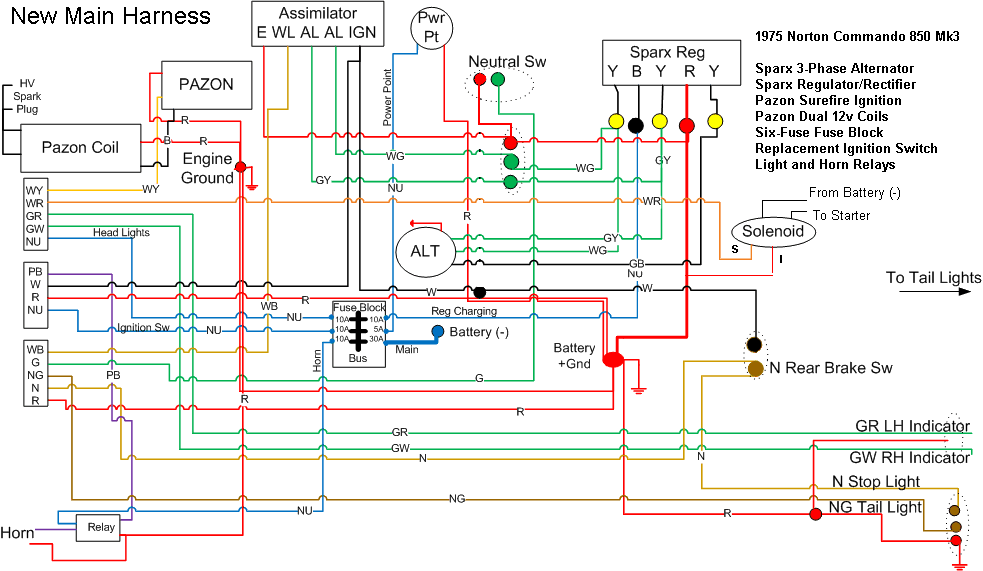
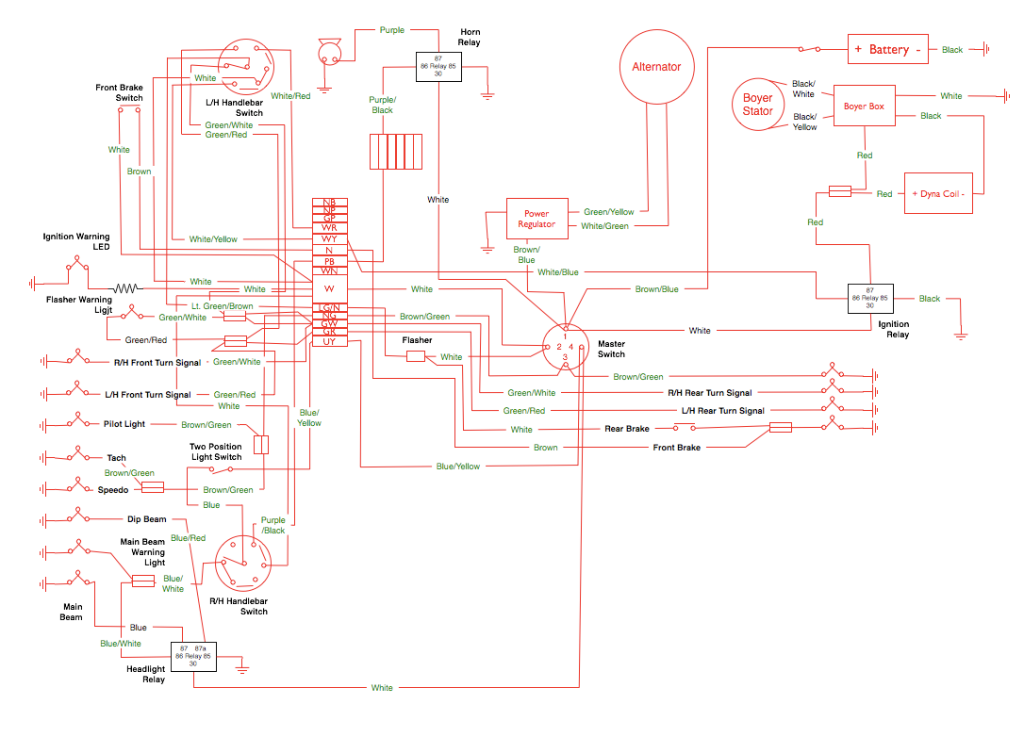
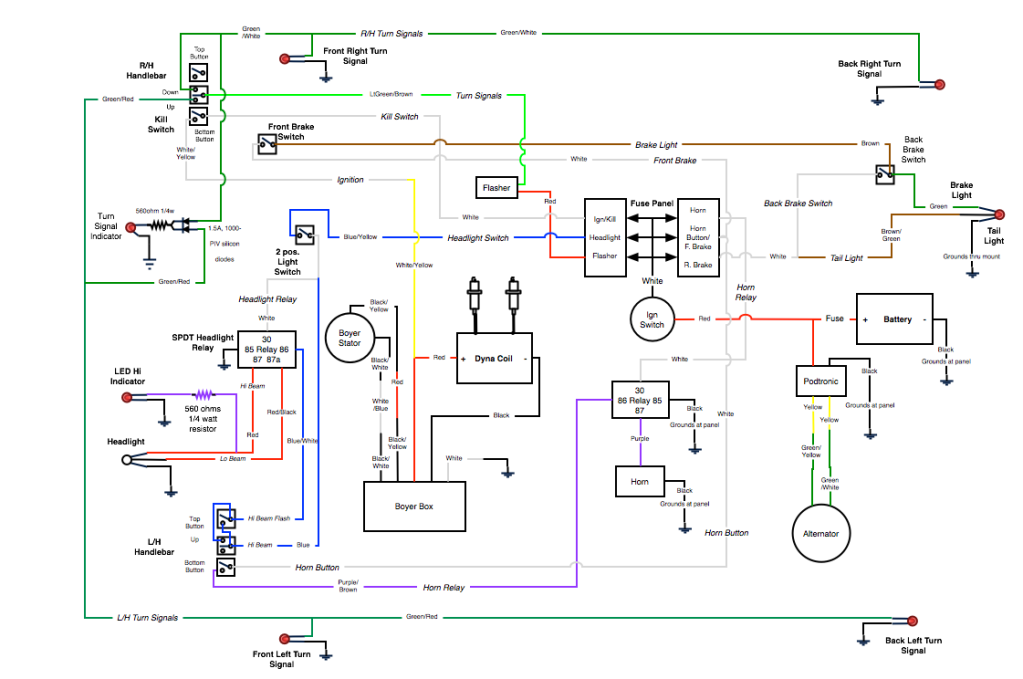
First things first - I had to come with a wiring diagram. I was able to do this in Microsoft Visio. It was actually pretty fun, although I like electrical stuff.
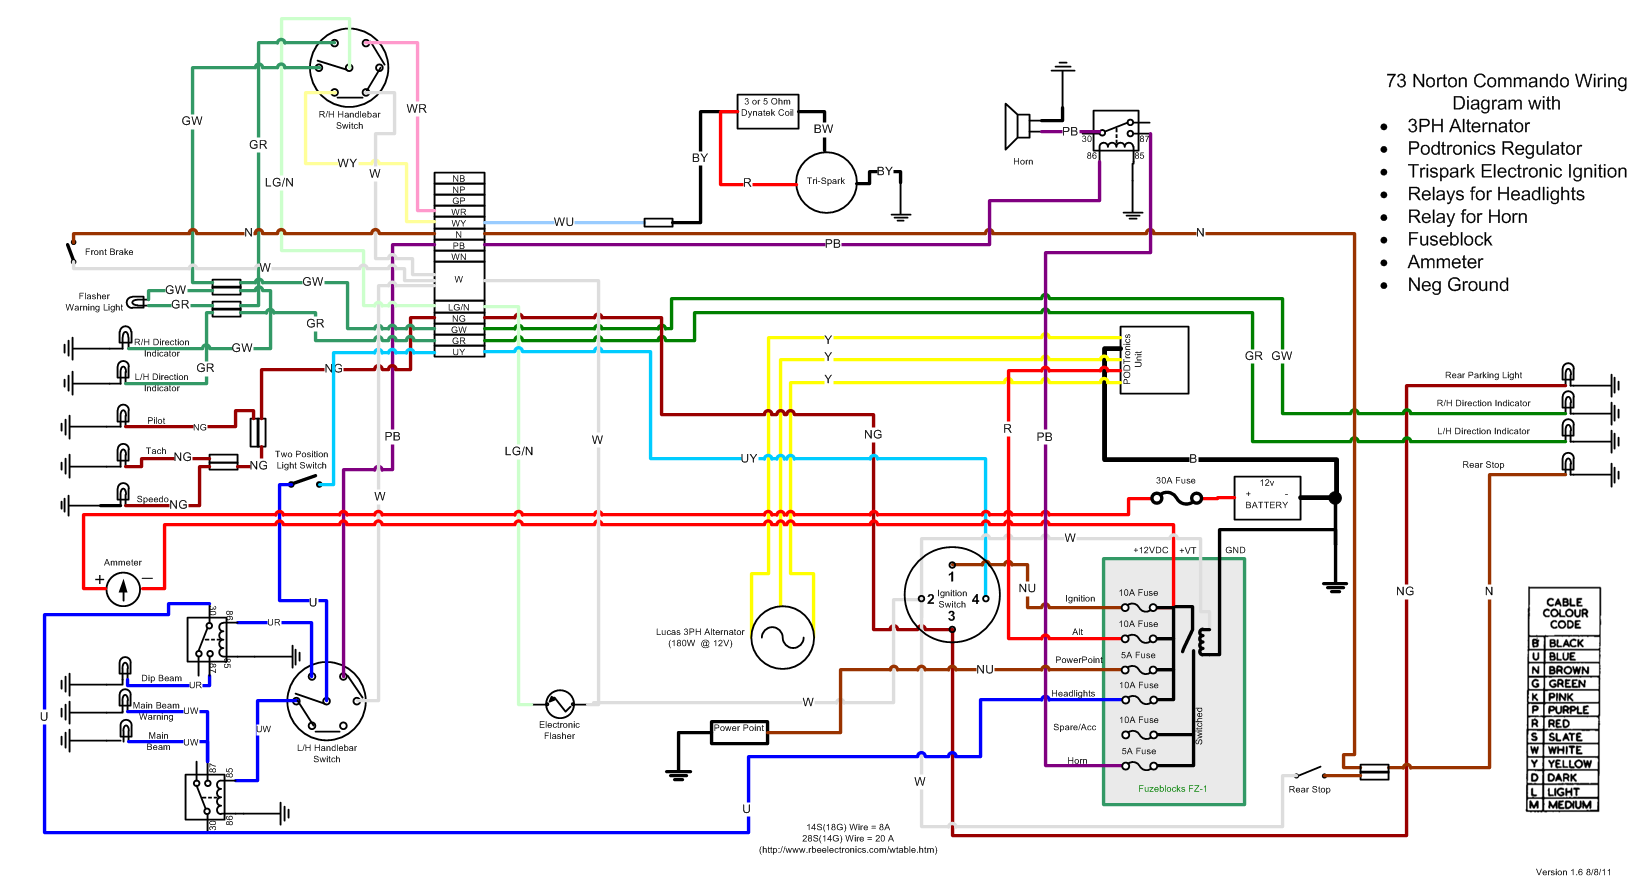
After getting that done and reviewed, i started in on the rewire. My basic plan is to wherever possible preserve the original sub-looms (like the headlight bucket, switch clusters, etc). To do that I'll need to make up my replacement loom with the correct bullet connectors. I know most aren't fans of these things, but my attitude is if they are maintained and treated nicely the will perform just as well as any other connector. I happen to like wiring and understand it, so I've never been stranded (from electrical problems - fuel problems are another story). I do think they are a wonderful British Lucas type product the provides hours of fun.
Parts:
| Qty | Desc | Vendor | Notes |
| 1 | 7" CIBE Reflector w/Parking Lamp | Daniel Stern | For US |
| 1 | Parking Lamp | Daniel Stern | Osram X6W xenon-filled 85-lumen |
| 1 | H4 Bulb | Daniel Stern | 65W |
| 1 | H4 Socket | Daniel Stern | Ceramic |
| 3 | Mini Relays | Eastern Beaver | 1 for Hi, Low and Horn |
| 3 | Mini Relay Sockets | Eastern Beaver | |
| 1 | Ammeter 12-0-12 | British Cycle | Cheap Piece of Crap |
| 1 | Ammeter O-Ring | ||
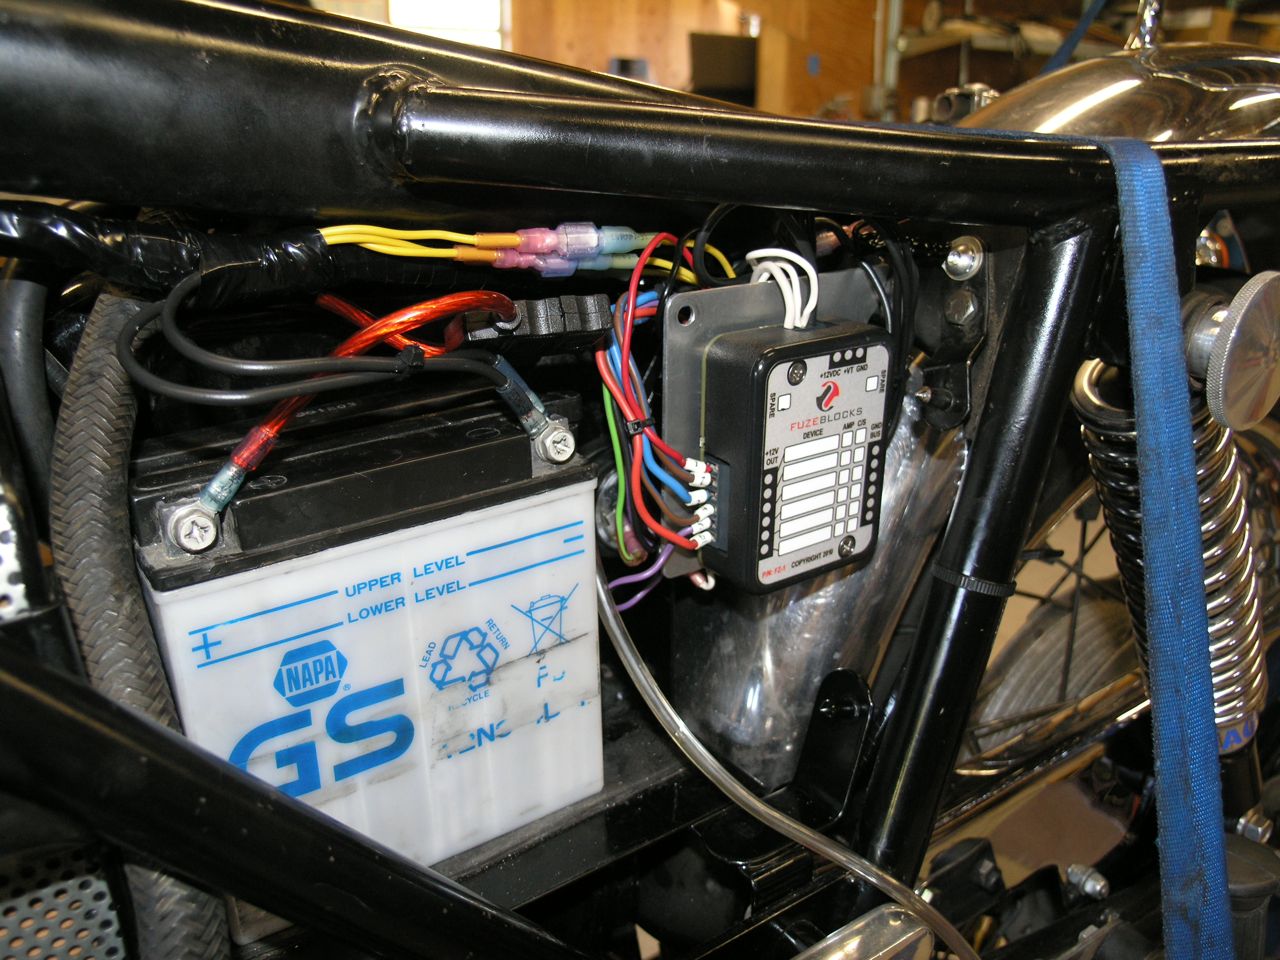
| 1 | Fuse Block | FuzeBlocks.com | |
| 1 | Electronic Flasher | Napa Auto Parts | I think it was an EL-12 |
| 4 | 10A LED Fuses | Electronics N More | |
| 2 | 15A LED Fuses | Electronics N More | |
| 1 | Powerlet Socket | Eastern Beaver | |
| AN | 14 Strand PVC Wire of correct colors | British Wiring | |
| AN | 28 Strand PVC Wire of correct colors | British Wiring | |
| AN | 14 Strand Bullet Connectors | British Wiring | |
| AN | 28 Strand Bullet Connectors | British Wiring | |
| 1 | Bullet Crimp Tool | British Wiring | Expensive!!! |
| AN | Adhesive Heat Shrink Quiick connects | Work Great! |
I'm probably forgetting a few things.
Headlight
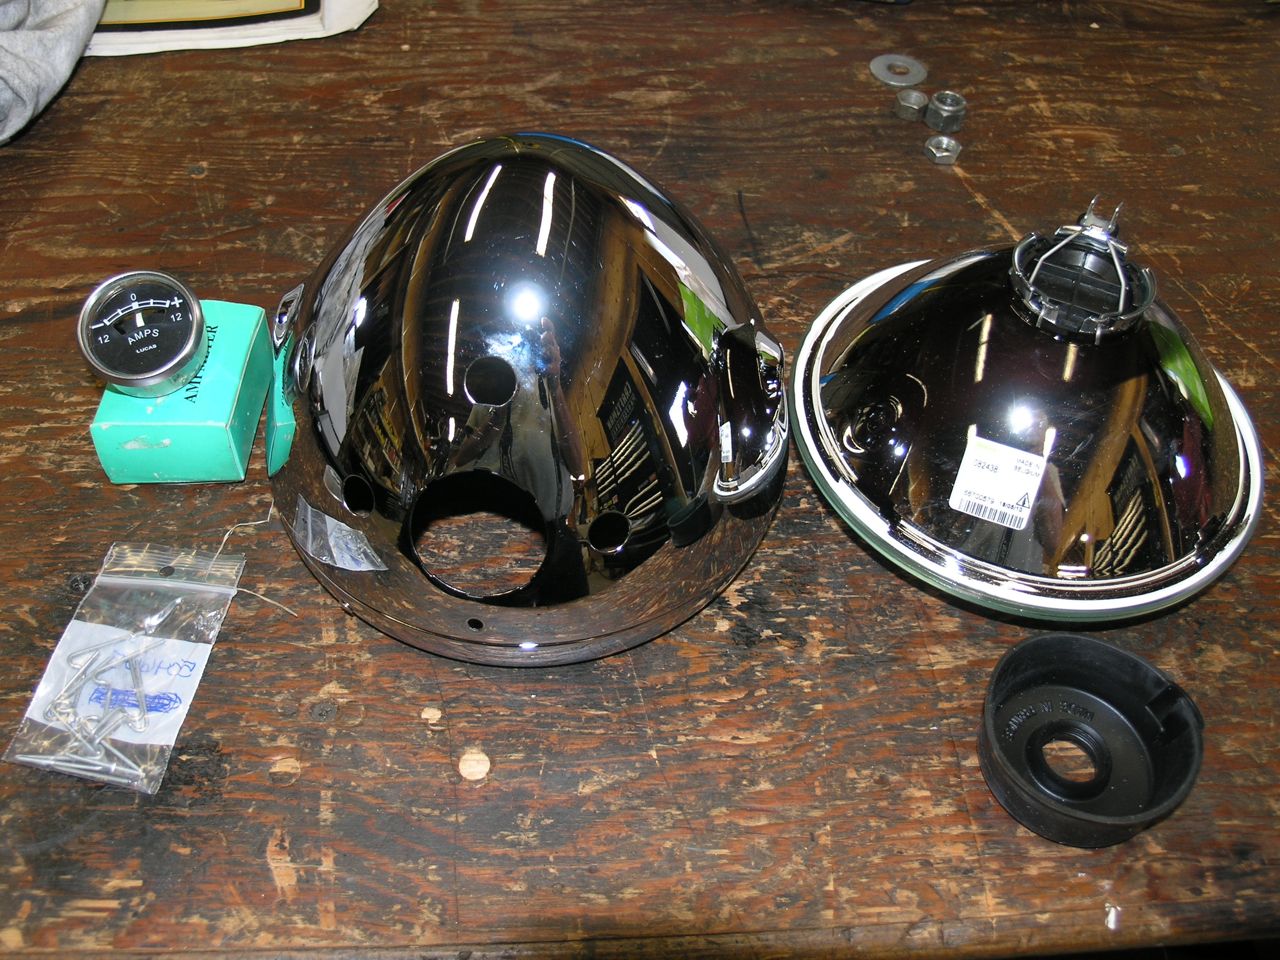
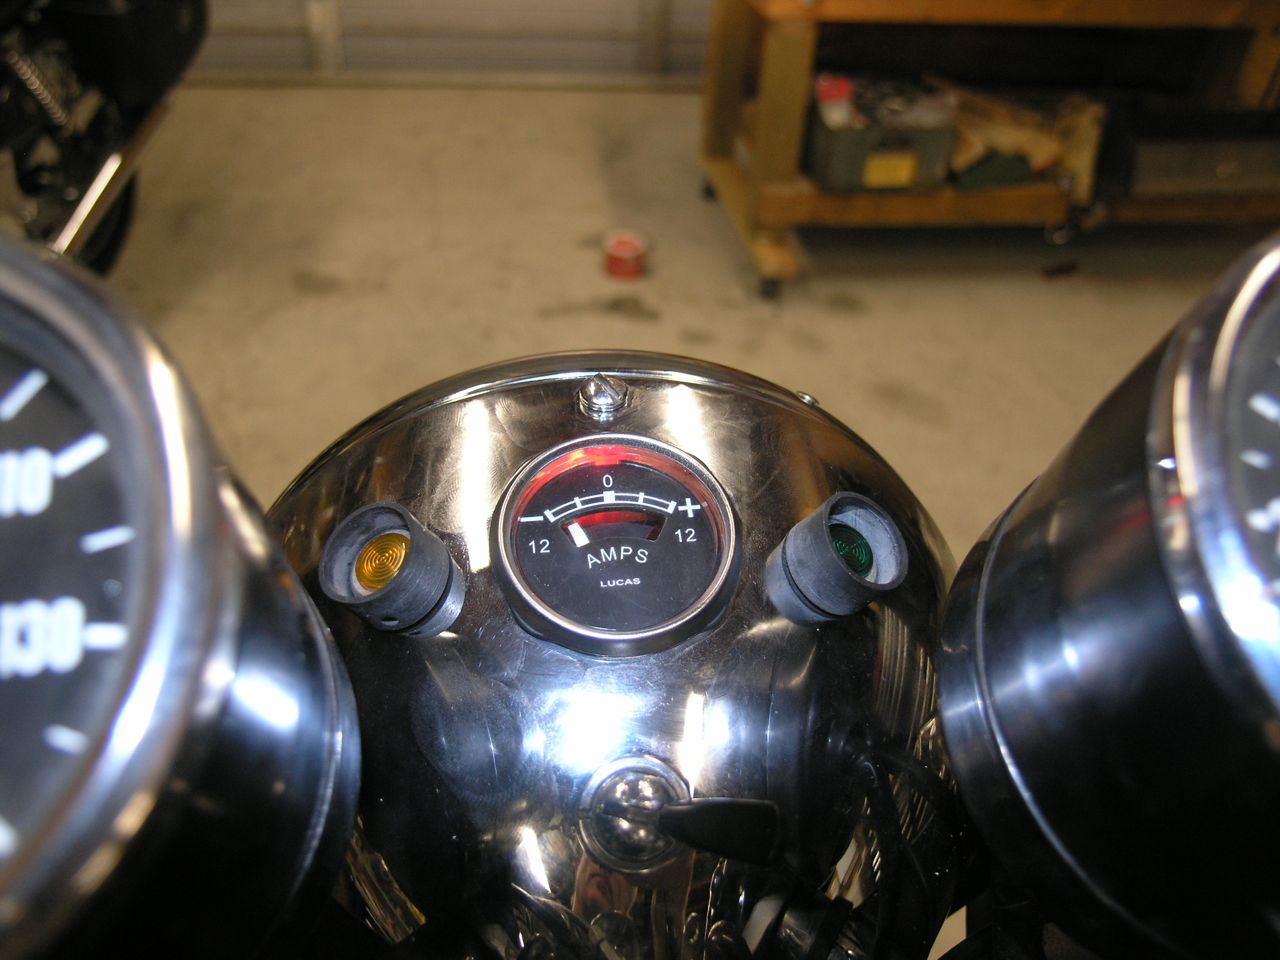
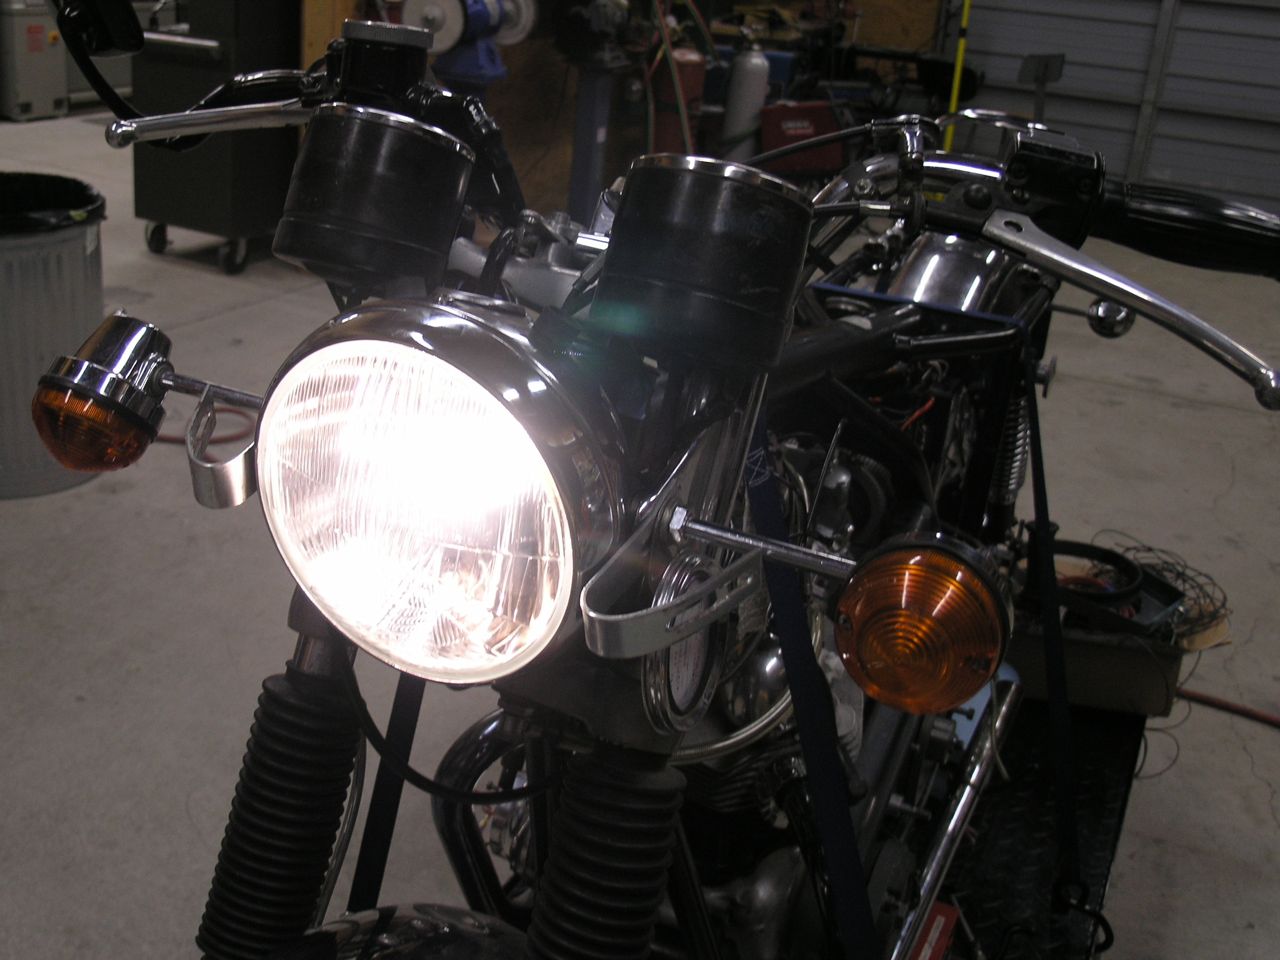
I'm installing an ammeter and my original '73 Headlight bucket didn't have the hole, so I purchased a pattern one on eBay. Same for the gauge which I'm already regretting. The ammeter is a cheap plastic piece of s**t. I'm sure it won't make it 15 mins. I've ordered a new English one from Wassell. Hopefully it will be better. I'm also upgrading to an H4 CIBE headlight, with parking light. Add to that a relay set up for the high and low beams. With the cool mini Panasonic relays I should be able to get everything stuffed inside the shell with no problems. I got some of the parts from http://www.danielsternlighting.com/ as well as eBay.
I've been running a zener diode based voltage monitor - described here Simple LED Voltage Monitor - for a while and wanted to incorporate it as I'd lost the assimilator and warning light. I'm hoping to use the ammeter clear plastic body as a way to show the volt meter LED by embedding the LED in clear plastic collar. Here's the collar, ammeter, and voltage monitor.

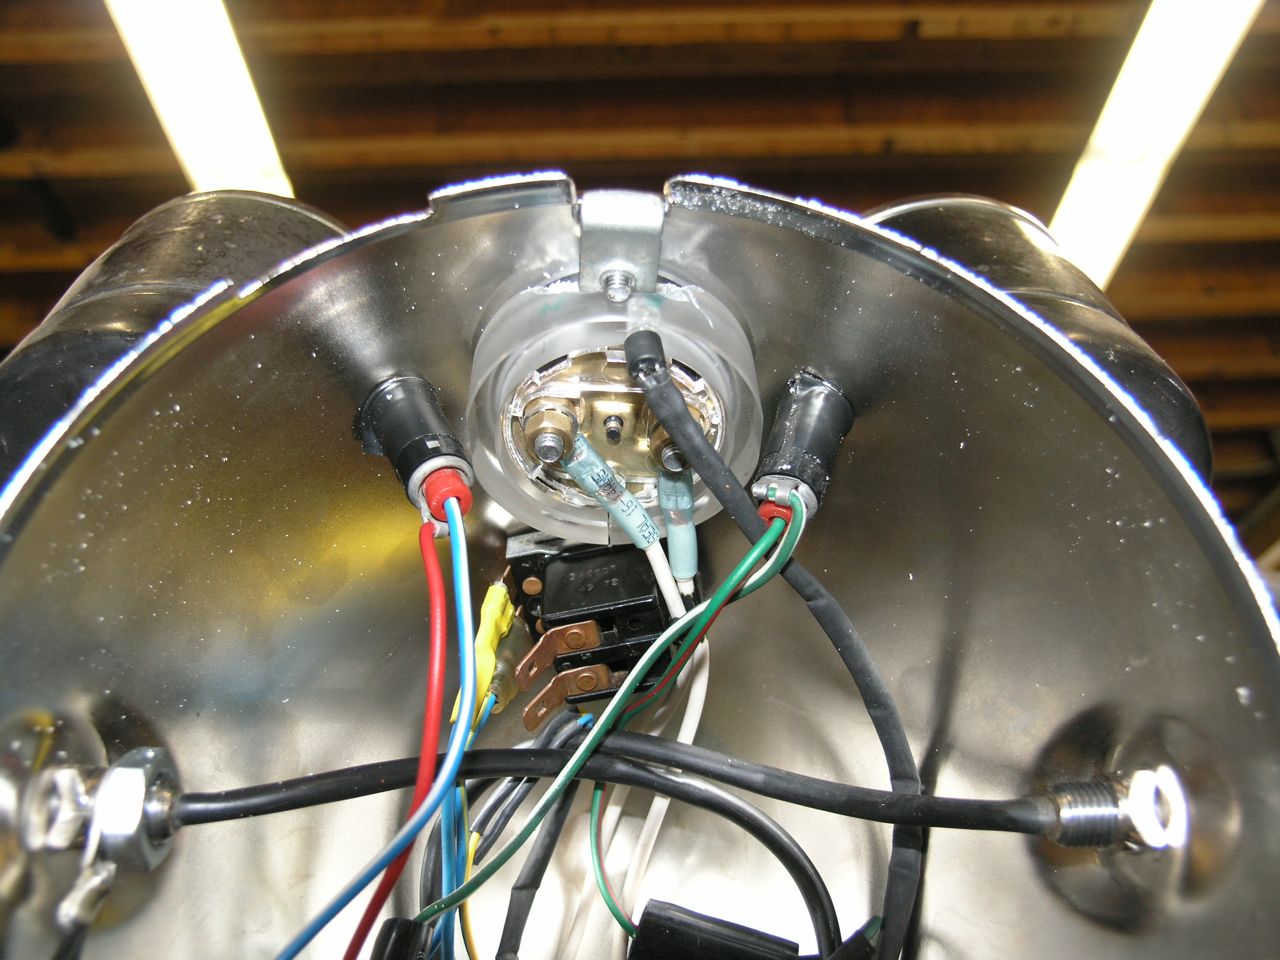
Here it is mounted.
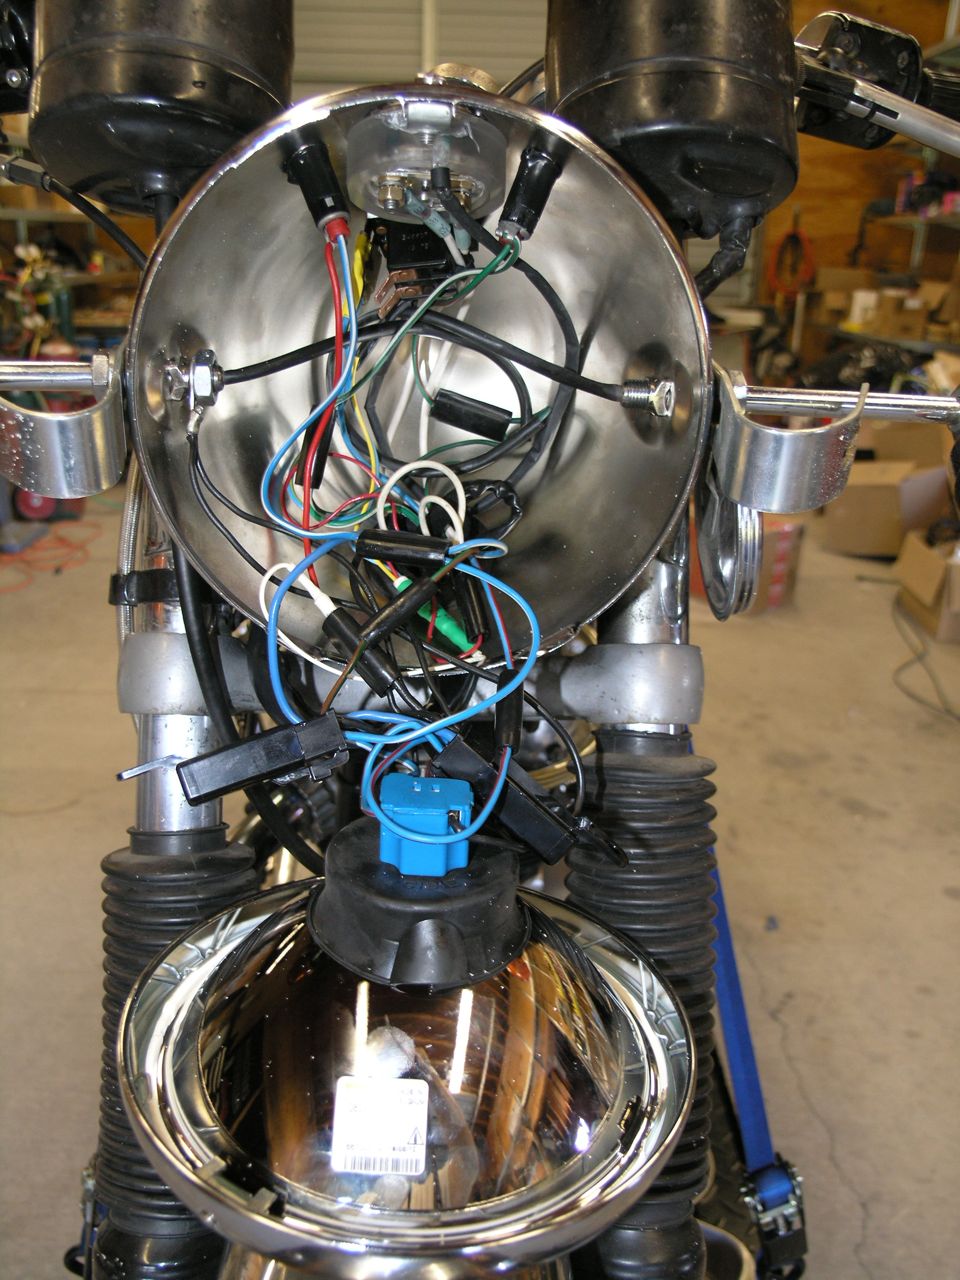
And with everything else!
Action shot - in this pic, the headlight is on which forced the voltage low enough to light up the LED!
Wiring Harness
It took a lot longer that I thought to get this where I was happy. My goal was to use Lucas bullets and quick disconnects where appropriate to be able to maintain stock switch gear, lights, etc. I also purchased the correct color coded wire from Britsih Wiring (http://www.britishwiring.com/). I broke down and purchased the special Lucas bullet crimping tool - a must have for these connectors. I used mostly 14 strand wire, but some 28 strand and even some 12 GA for the main power runs.
| Strand | Gauge | Amp Capacity |
| 14 | 18 | 8A |
| 28 | 14 | 20A |
(http://www.rbeelectronics.com/wtable.htm)
I started by removing the old harness and studying how it was routed. I then starting roughing out my wires, leaving some extra at each end. I followed my wiring diagram and it worked out almost perfectly. The only real thing I had to think about was the grounding - that doesn't really show up on the wiring diagram.
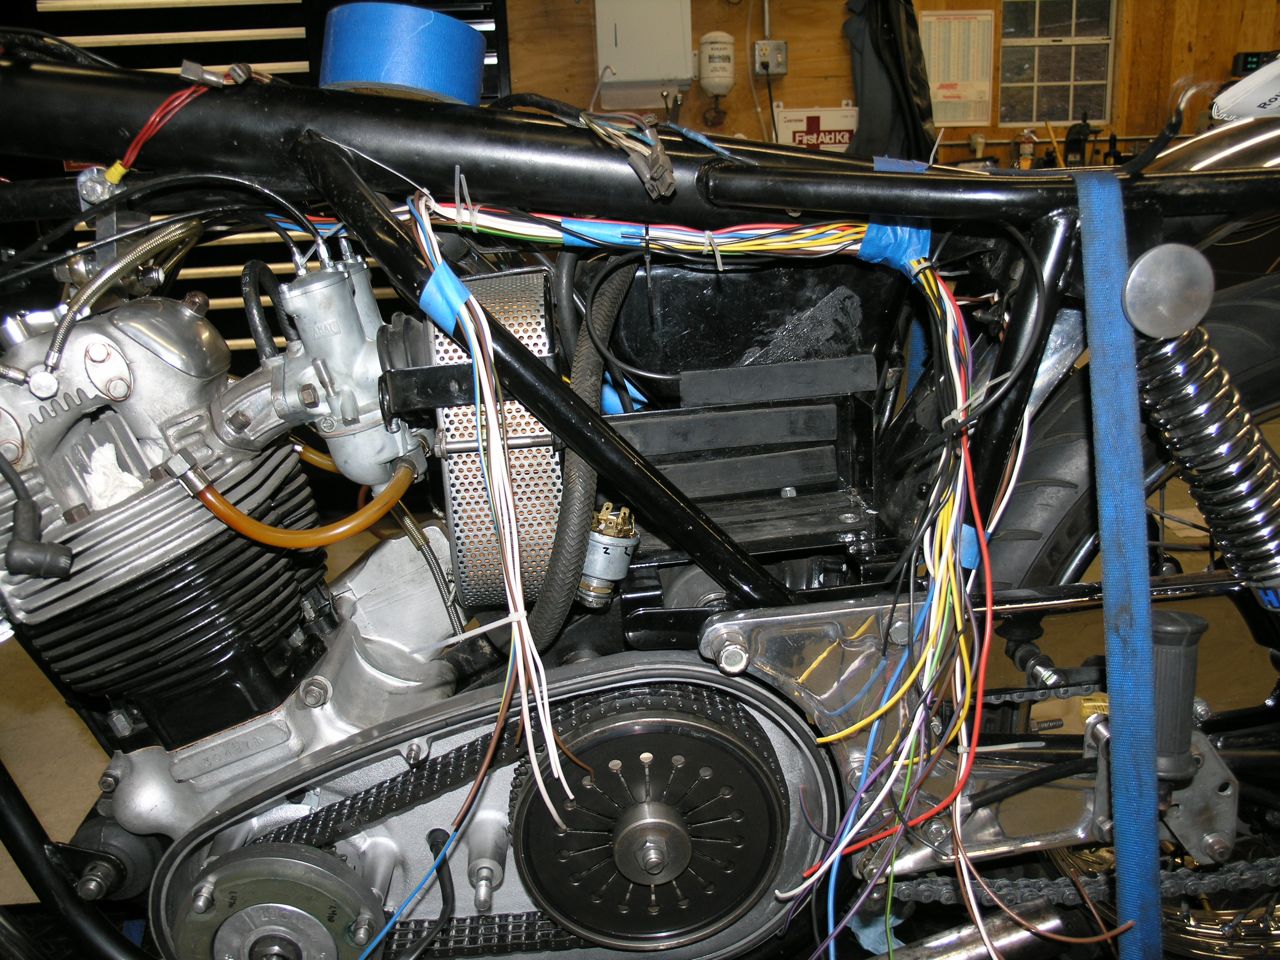
After getting everything roughed out, I started cutting and terminating the ends. I soldered all the Lucas bullets I used as well as crimping and most of the other connectors. The ones that I couldn't solder were the adhesive heatshrink criimp type.
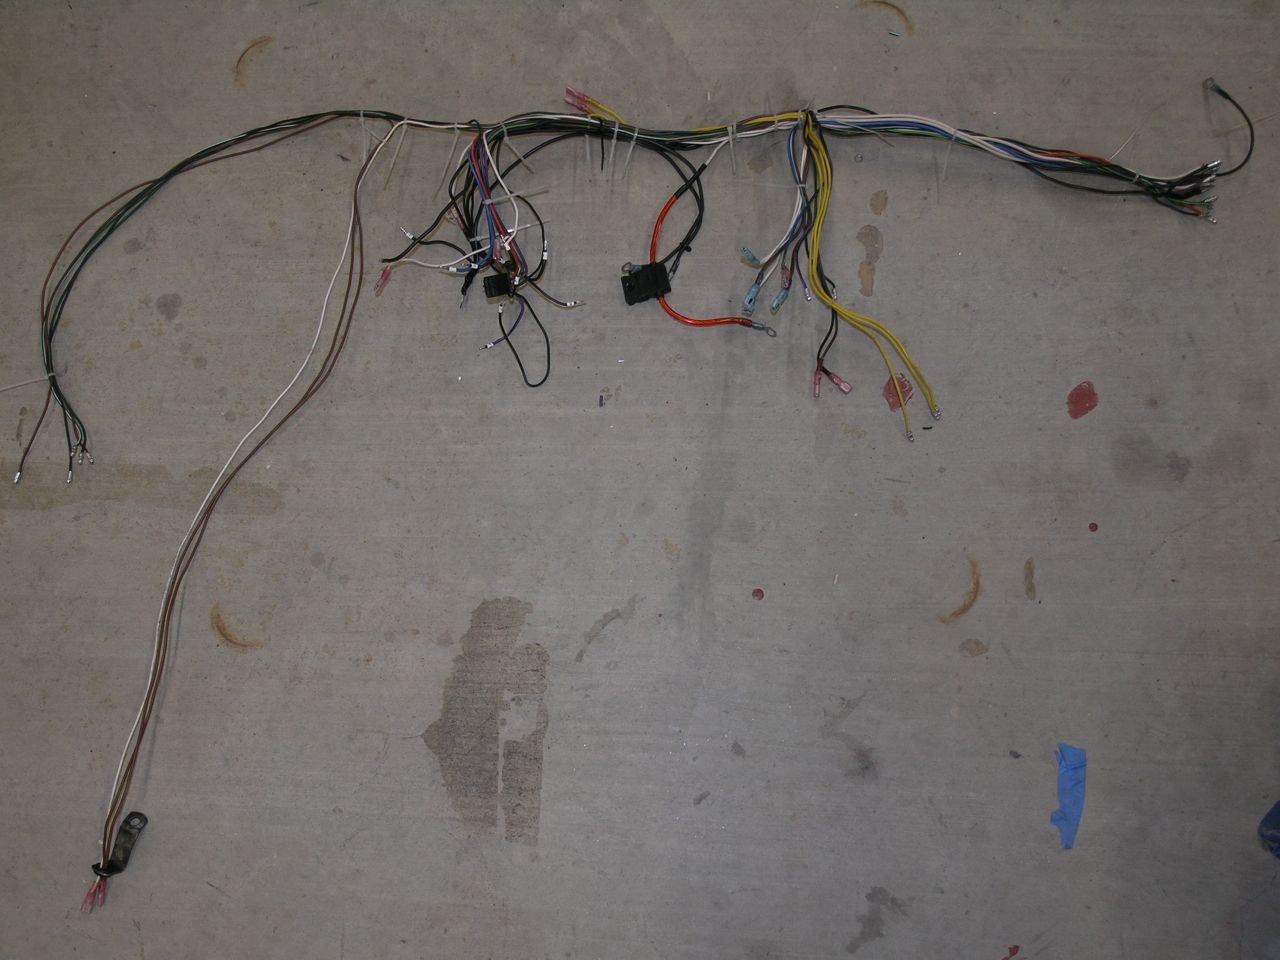
Here it is before I wrapped it in the non-adhesive tape
And after
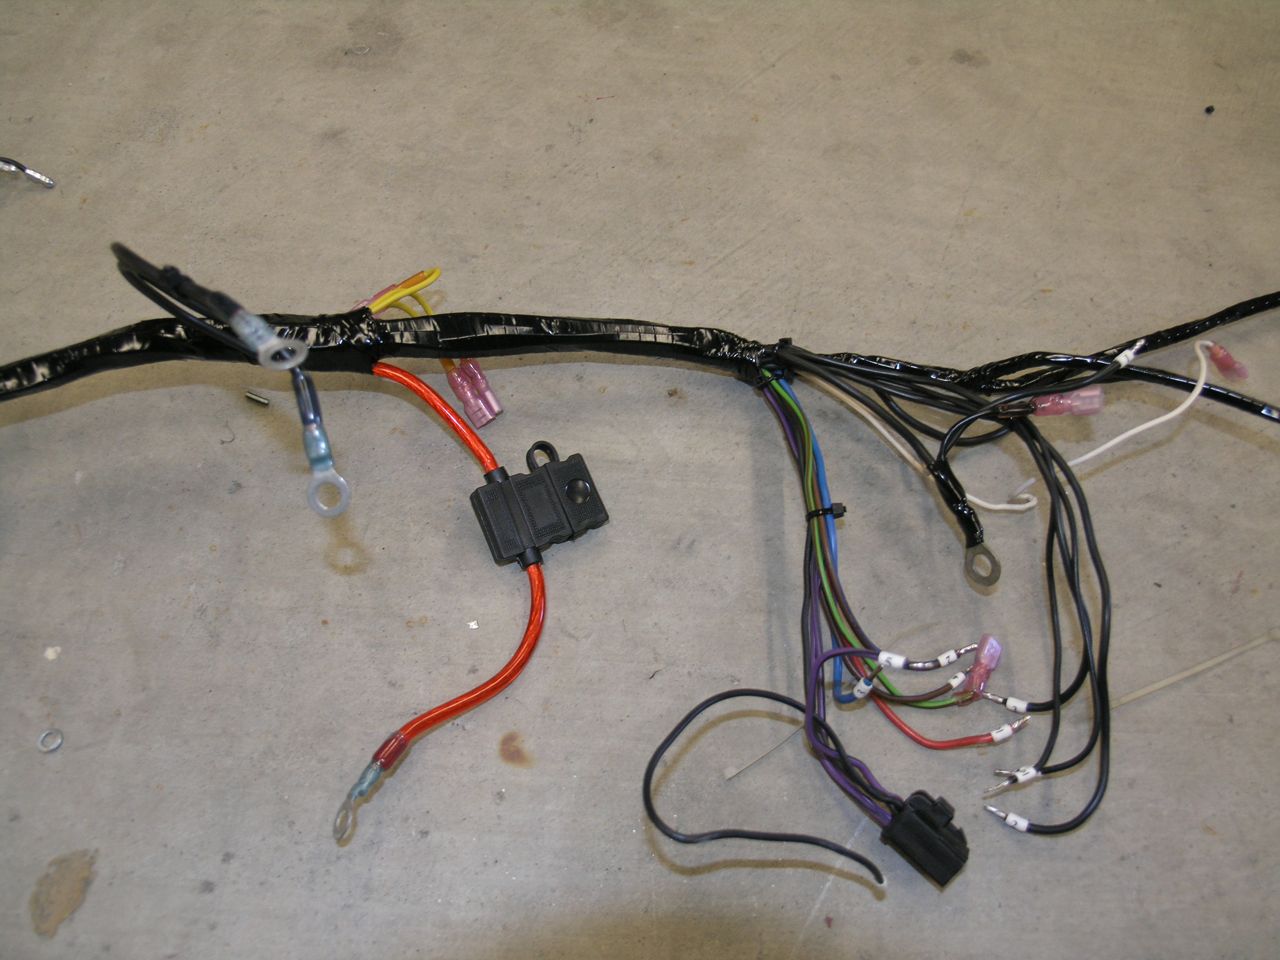
I think it turned out pretty good for my first attempt.
Bracket
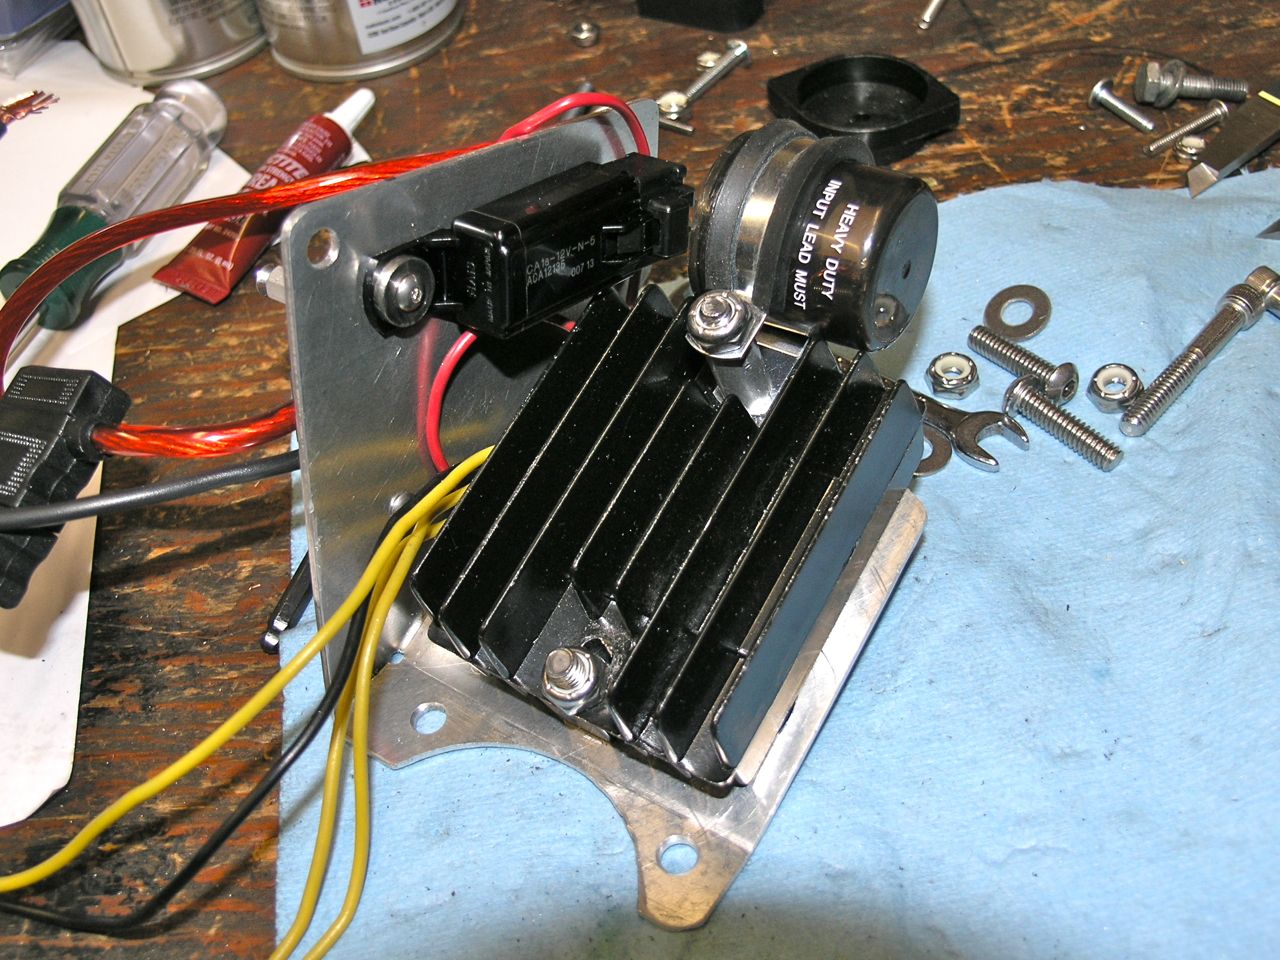
I wanted to make a bracket to mount the fuseblock, Podtronics, electronic flasher and the horn relay. It took a while, but here's what I came up with.
First I modeled it in 3D (really just to get practice doing things like this).

Then I printed out the plan in a 1:1 scale and glued it directly to some 0.080" thick aluminum.
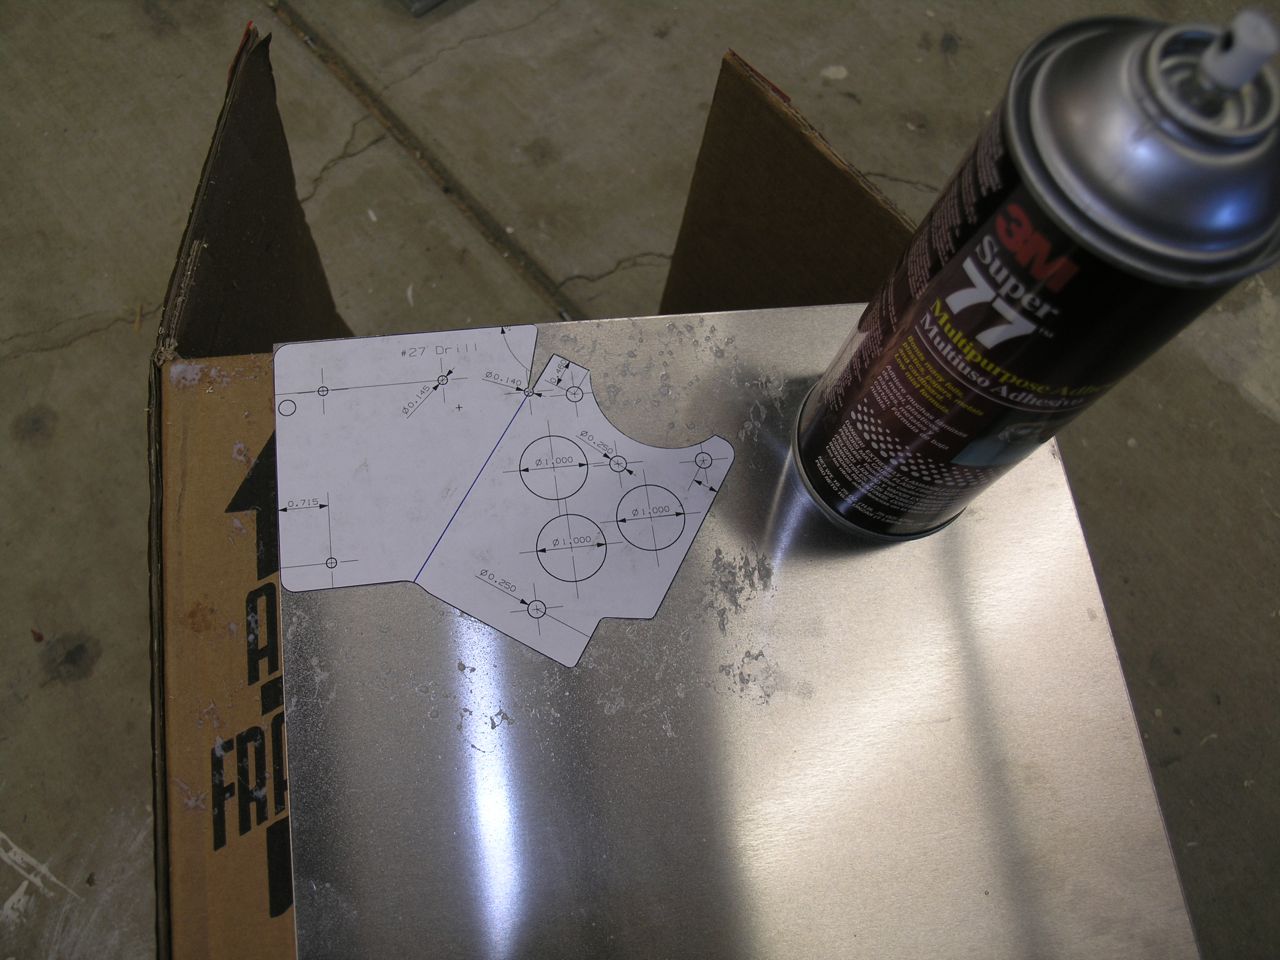
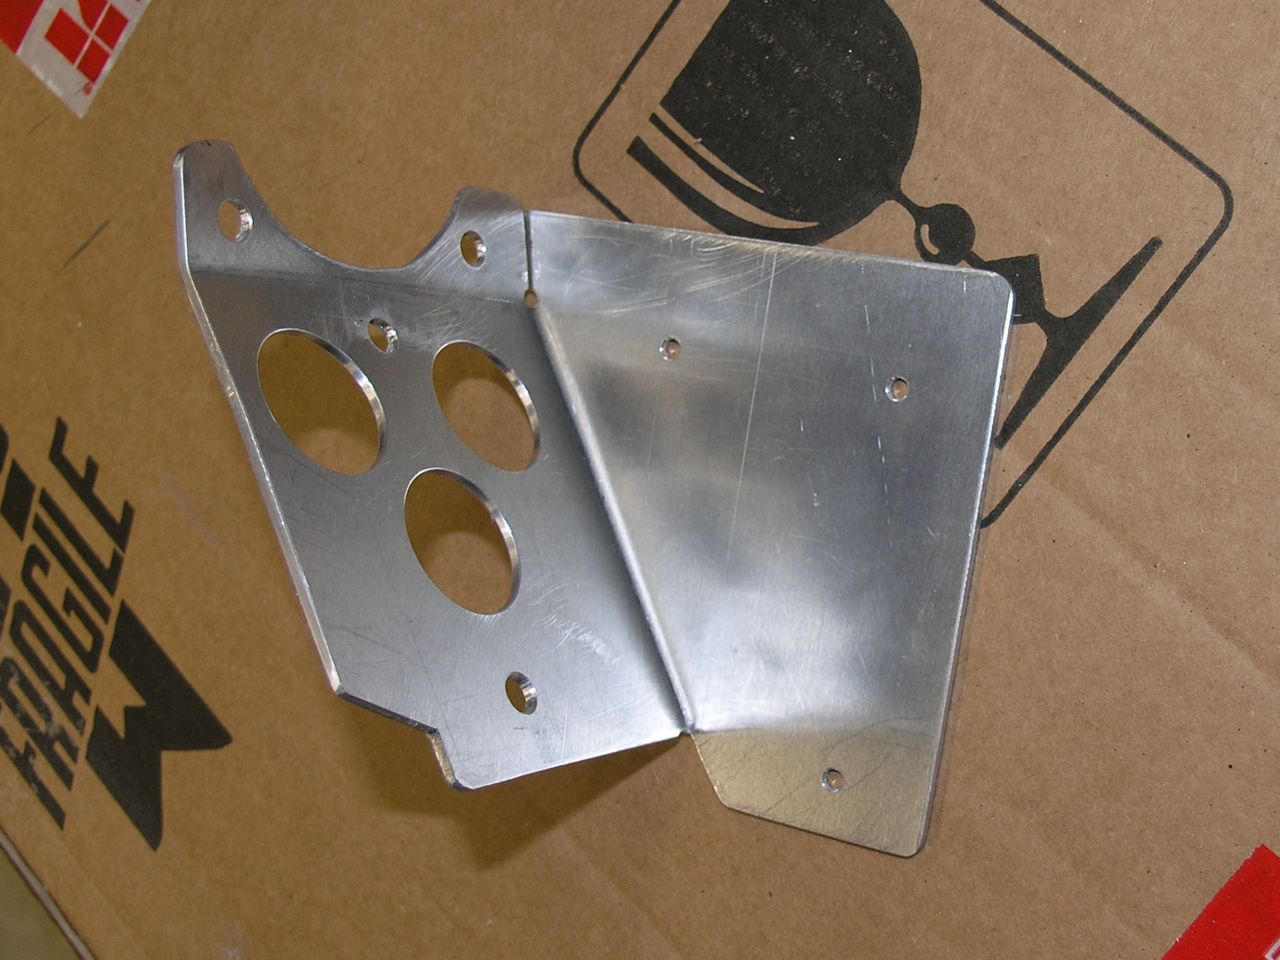
I then cut i out, drilled the holes and bent it along the guidelines. Removing the paper got me here:
I then mounted up the components:
and finally mounted it on the bike. There goes a week of build time...
I found these cool LED Fuses that when they blow, the little LED lights up to tell you which one blew. I also can't wait to have a failure! (http://www.electronicsnmore.com/product_info.php/products_id/8463)

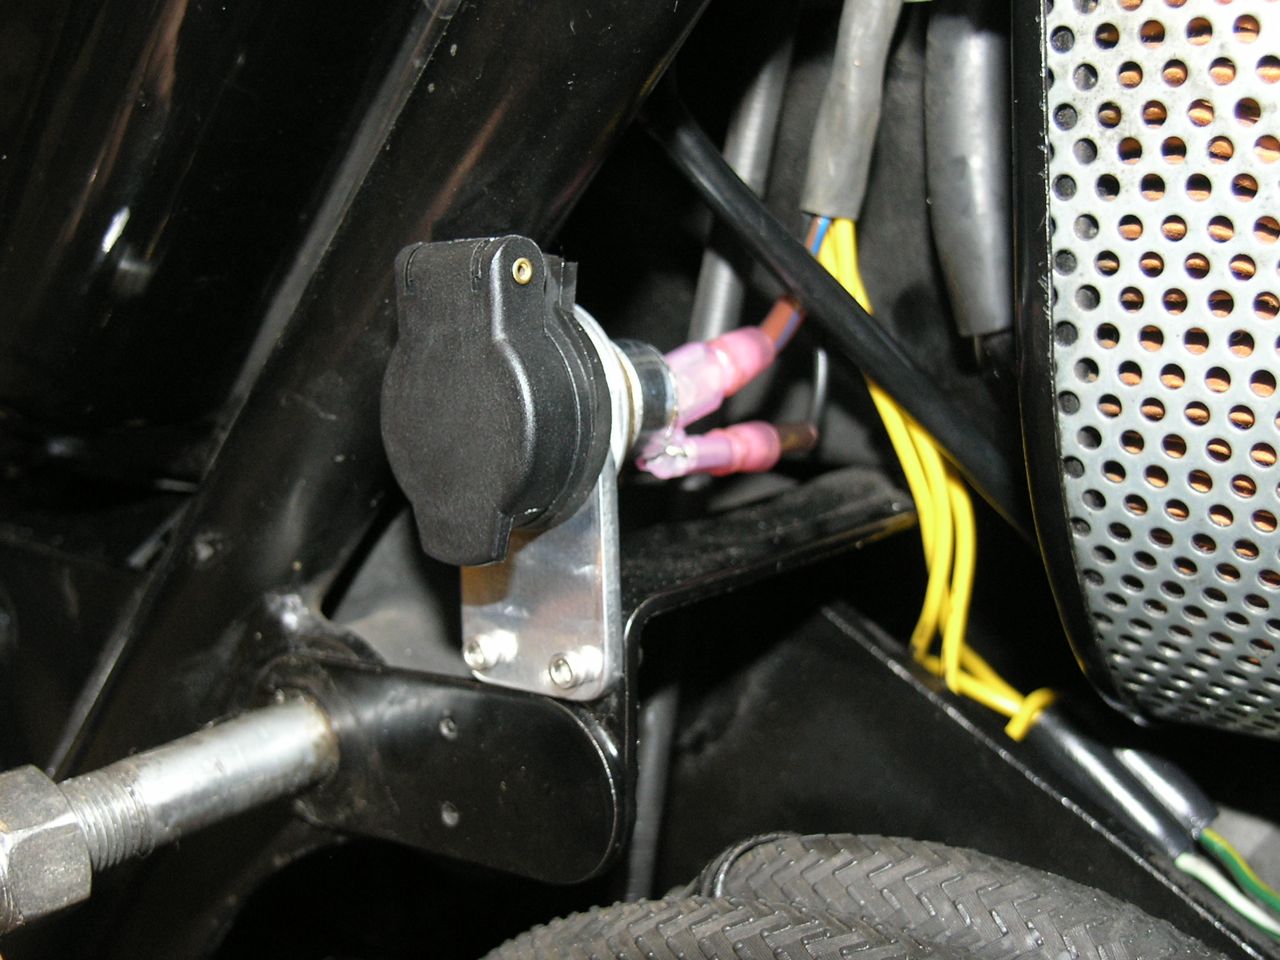
I also added this Powerlet Socket as the original Norton one is pretty silly.
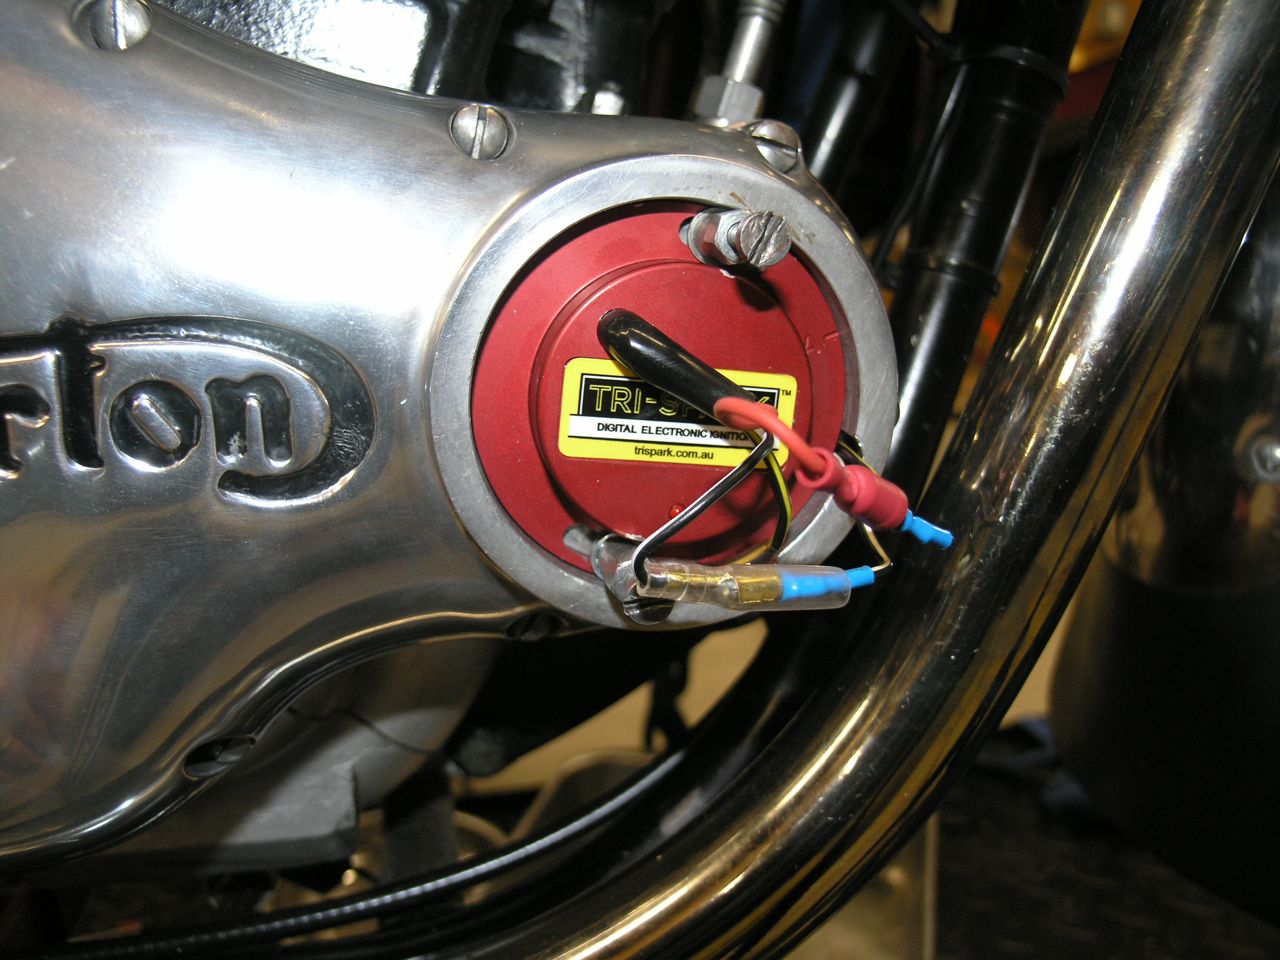
And don't forget the TriSpark.
Final product - So I put the battery in and tried the system - everything worked perfectly. I guess that planning pays off.
{youtube}hoITEh-k9f4|400|300|1{/youtube}
What sort of amazes me is I made this video on my iPhone (captured AND edited it).
I'm fortunately not the first one to think of this so there is lots of help out there. Swooshdave was once again inspiration and here are some links to his exploits.
http://www.accessnorton.com/wiring-for-super-dummies-t5603.html
Here's some stuff on LED Turn Signals