C41 - Chains
Chain Serviceability
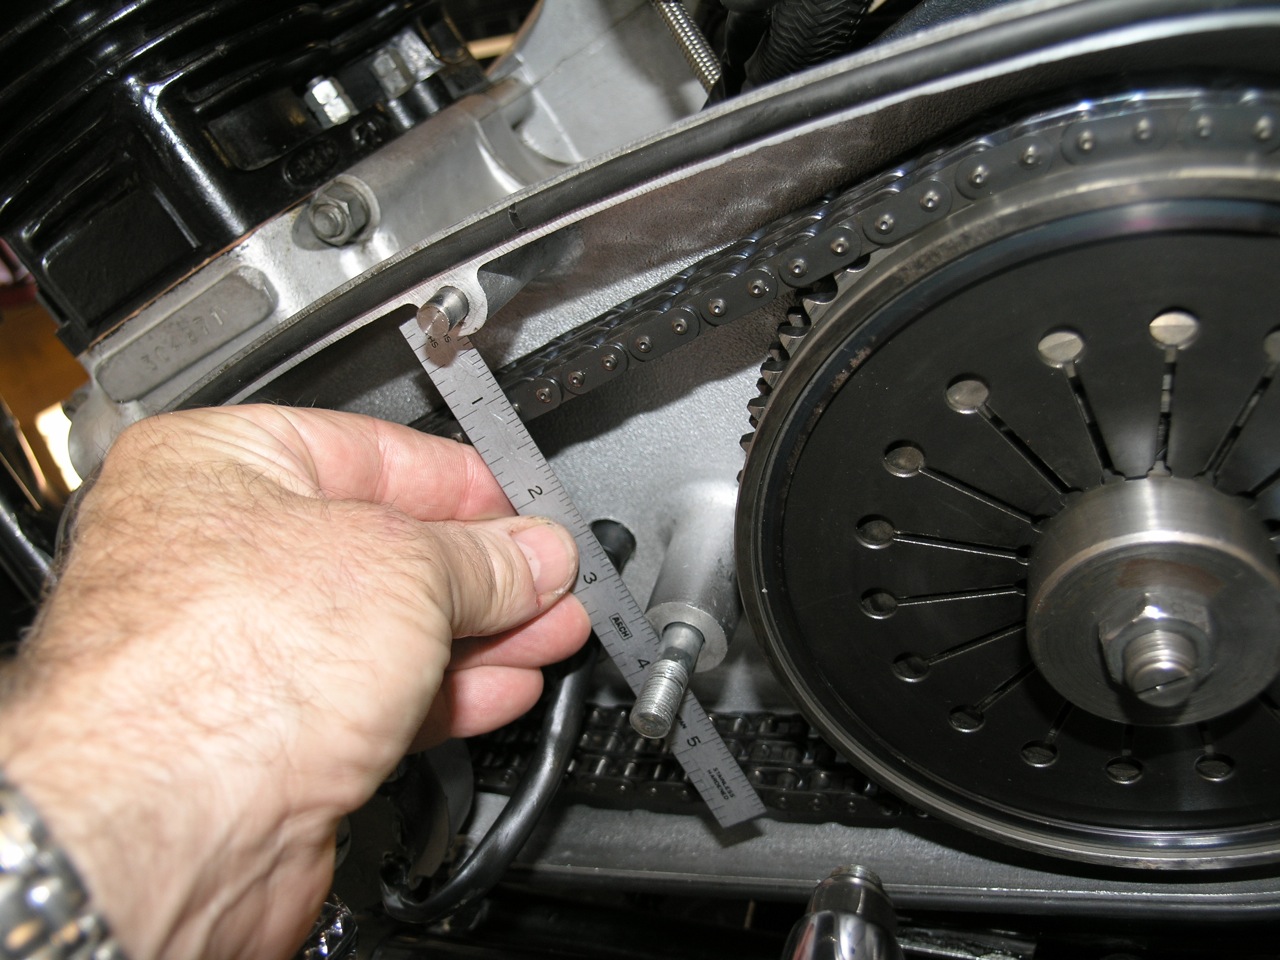
The wear limit for both the rear chain and the primary chain is a length extension of 2% of clean chain.
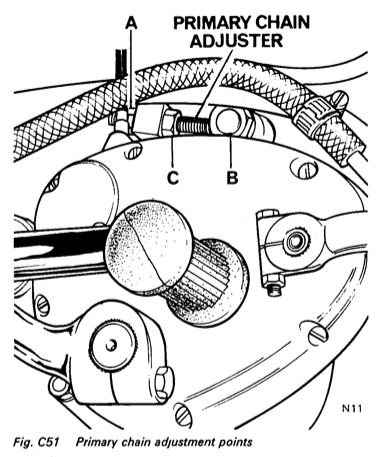
Primary Chain Adjustment
Because the gearbox and engine are separate units, adjustment is made by pivoting the transmission on the bottom bolt. You should follow this procedure to ensure the adjustment holds due to the high power output of the Commando.
1) Check the up/down moevement on the primary top run by inserting your finger through the upper inspection cap (if the cover is on). You are looking for total up/down movement of 3/8". Of course it's easy when the cover is off.
If it's out of spec, proceed as follows:
2) Loosen the tranny top bolt (B in the diagram). Note the nut on the left side of the bike is captive and won't turn.
NOTE: There is an upgrade to replace the left hand nut with a left hand adjuster, similar to the right side. It allows a much more positive resistance to the forces generated by the engine.
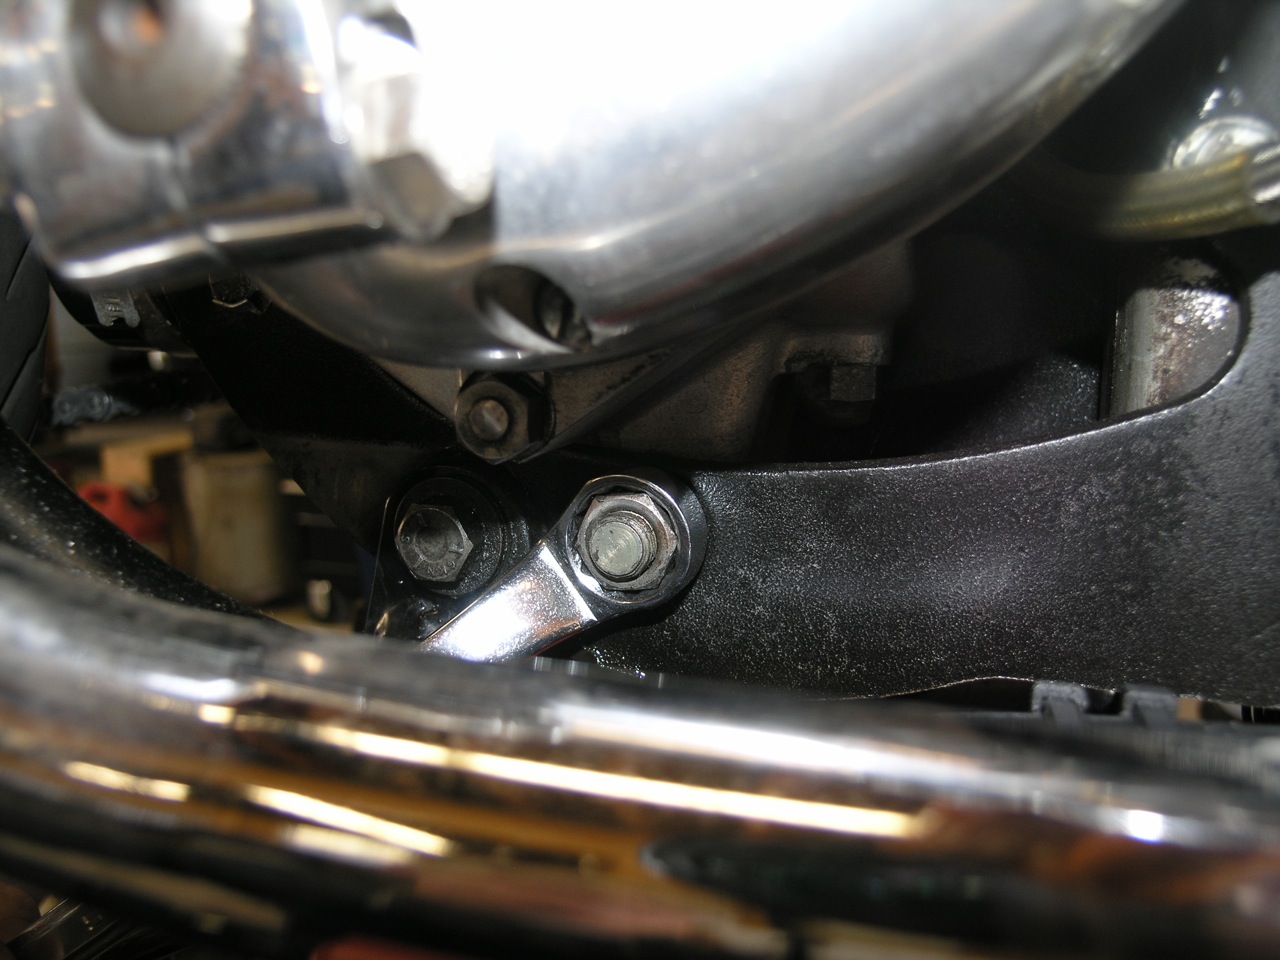
3) Loosen the bolt on the tranny bottom.
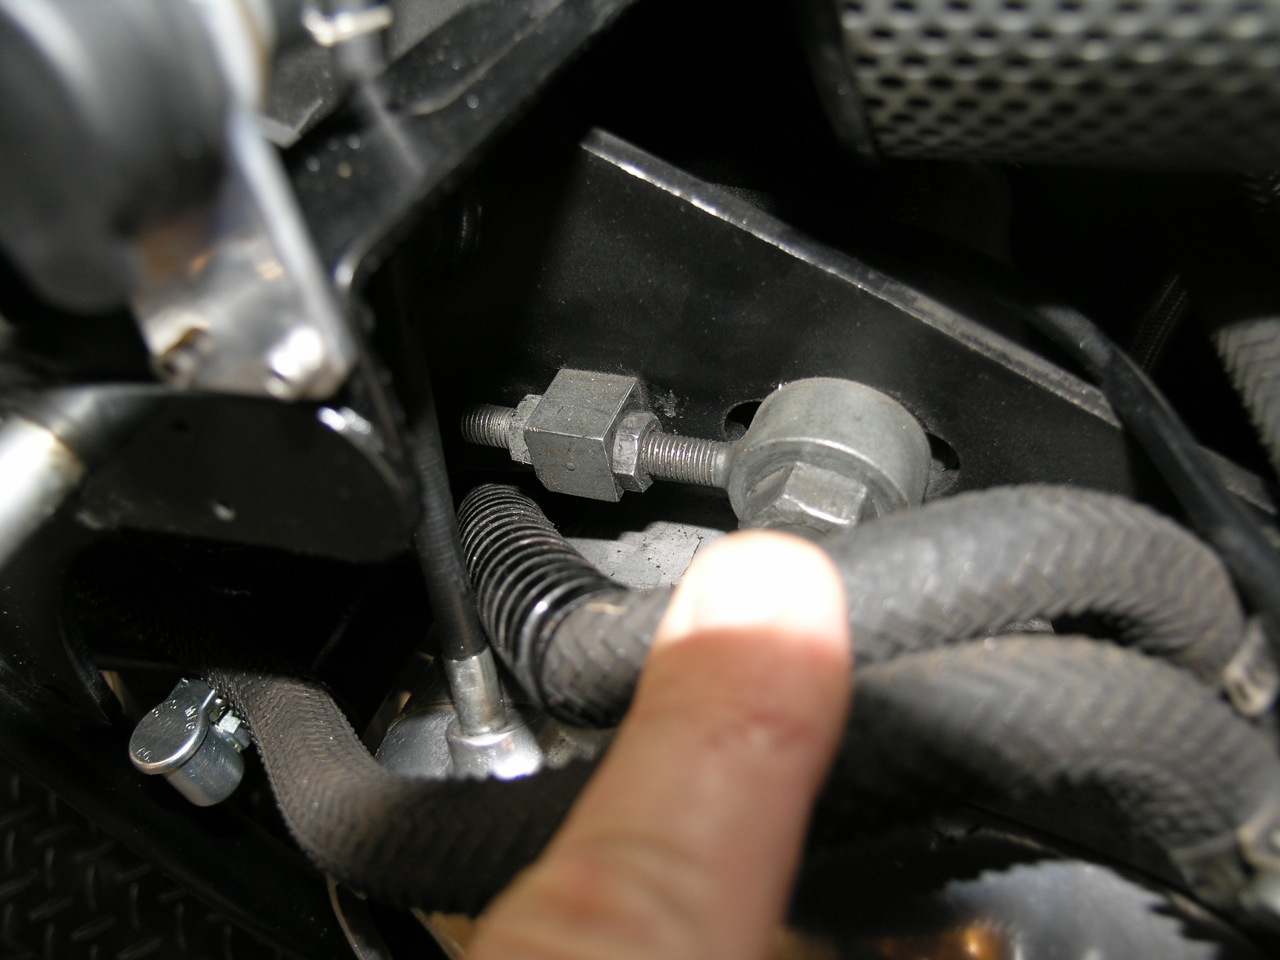
4) Loosen the front nut (C) on the adjuster eye bolt 2 or 3 turns.
5) Now tighten the rear nut (A) on the adjuster eye bolt until, by feeling with your finger, the chain becomes tight.
6) Now loosen the rear nut (A) and tighten the forward nut (C) until you get to 3/8" of up and down movement.
7) Tighten the rear nut (A) to lock up the adjuster. Recheck the tension in at least places. If necessary, readjust so the tightest point gives the 3/8" of play.
8) Tighten the tranny bolt back up. Lube the thread of the tranny top bolt (B), fit the nut and torque to 70 ftlb.
1) Loosen the rear wheel spindle nuts (A).
2) Undo the chain adjuster locknuts (B).
3) Pull downwards on the bottom run of chain to bring the spindle hard up against the adjusters (C).
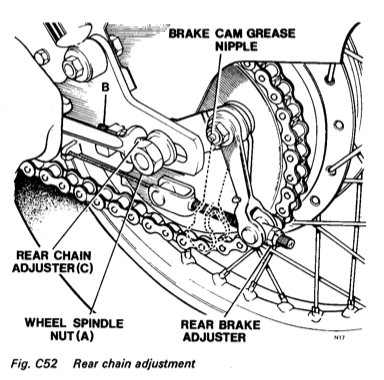
4) Turn each adjuster an equal amount until - with a rider seated - the total up and down movement measured at the center of the bottom run is 3/4 to 1".
5) Tighten up the adjuster locknuts (B).
6) Tighten up the wheel spindle nuts and recheck the adjustment in at least 3 places. Make sure the tightest spot is at the correct adjustment.
7) Recheck rear brake adjustment as in Section H13.